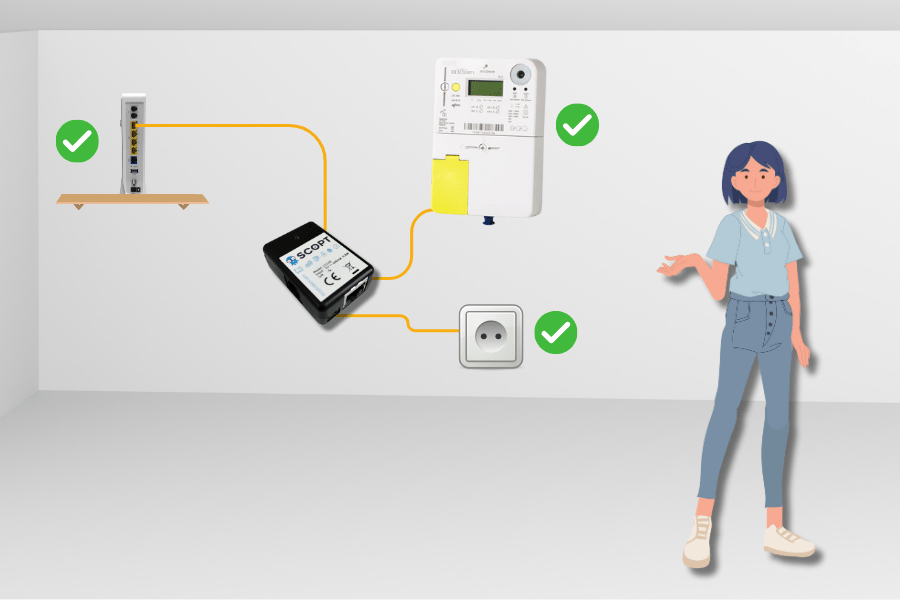
Dongle V1

Find out how to install the Scopt Dongle V1 here.

ScoptVision Dongle V1

Check the installation conditions first:

installation conditions

Step 1:

Activate the P1 port of your digital meter

Before we can read the data from your digital meter, it is important that the P1 port is activated. To do this, you must first go to your personal login page on ” My Fluvius “, once you are logged in, you can activate the P1 port.

ScoptVision Dongle V1

Step 2:

Installing the dongle

The installation of the dongle is very easy.
Next to it you can find a step-by-step video.

All you need is a power outlet and a wired network connection.

Step 3:

Activating the dongle via the app

Once everything is installed properly you will need to activate the dongle.

Surf to https://app.scopet.be

Create an account and follow the steps in the app.

*Make sure you are on the same network as the dongle. For example, that you are not accidentally connected via 4G or another wifi network. Otherwise the dongle will not be found.

ScoptVision Dongle V1

Step 4:

Install the app on your home screen

Once everything is installed properly you will need to activate the dongle.

Surf to https://app.scopet.be

Create an account and follow the steps in the app.

*Make sure you are on the same network as the dongle. For example, that you are not accidentally connected via 4G or another wifi network. Otherwise the dongle will not be found.

Welcome to the Scopt platform!

ScoptVision Dongle V1

Got a question?

Do you have any questions? Take a quick look at our FAQ page and find answers to the most common questions.

Faq